7 Pro-Tips for Web Design

Here at The Site Slinger we live and breathe web development – we’ve been experts in turning design to code since 2009! All too often, website design files get submitted to us missing some of the fundamental components for effective and efficient web development. Whether you are a designer working on a website for a client, or a client who isn’t sure what they need to get from their designer, following these pro-tips will get your design ready to be turned into code.

Here at The Site Slinger we live and breathe web development – we’ve been experts in turning design to code since 2009!

All too often, website design files get submitted to us missing some of the fundamental components for effective and efficient web development.

Whether you are a designer working on a website for a client, or a client who isn’t sure what they need to get from their designer, following these pro-tips will get your design ready to be turned into code by our team at The Site Slinger.

7 Pro-Tips for Web Design


DO 
design in Photoshop, it is the best for web design (sorry, Illustrator, Fireworks and InDesign fans!)

DO design all of the pages you want to see as HTML or on a WordPress site — We match your designs exactly!

DO design all animation states, javascript validation, button states (click, hover, off), modals and anything else you can think of. If you don’t see it in the design, we can’t see it to code it!

DO label and organize your Photoshop design “PSD” files — 1 page per PSD, organized into labeled folders and layers.

DO say “I’m not sure, I will have to check” to a client if you are unsure on complex functionality or implementation — Its okay to say “I don’t know” – that’s why we are here!

DO
 talk with your developer and spec out your project before signing off on designs.

DO ask questions and get to know your friendly Austin, Texas web developer. We are always happy to answer questions about turning designs into code!

Have a question about one of these pro-tips or want to know more? Chat with a Site Slinger from 8am-6pm CST here on our website, or contact us.

*Image courtesy of Wikimedia Commons, used under the Creative Commons license.

25 Professional and Incredibly Powerful Photoshop Plugins

Freebies are awesome, and design blogs are full of them, but sometimes you need a professional tool to handle professional tasks. There are a wealth of extremely powerful and high quality Photoshop tools that can dramatically improve your workflow.

Freebies are awesome, and design blogs are full of them, but sometimes you need a professional tool to handle professional tasks. There are a wealth of extremely powerful and high quality photoshop tools that can dramatically improve your workflow and are worth every penny you have to spend to get them.

Today we’ll look at a number of the best tools available for making color adjustments, adjusting focus, enlarging images, transforming layers in 3D, reducing noise, creating textures, applying complex masks, and even taking that PSD into full-blown HTML.

Color and Exposure

Exposure 3

“Over 500 analog techniques and organic looks are back like cross processing, Polaroid and vintage Daguerreotype. There is careful research under the hood, but the controls are simple so you can focus on the creative choices. The result is a photo that looks like it was made by a human, not a computer.”

Price: $249.00

screenshot

PhotoTune 3

“Great color, it’s not as hard as you think. If you can compare images side-by-side and pick the best one, then you can easily color correct and enhance your images with PhotoTune 3. Additionally, PhotoTune 3 improves the color and sharpness of your image without the need to know how to use levels or curves in Photoshop.”

Price: $159.95

screenshot

Kubota Artistic Tools Viva La Vintage

“Add some new fun to your images with these Kubota Actions inspired by vintage looks your clients will love! These classic effects are wildly popular around the industry and in high demand from photographers and their clients. ”

Price: $109.00

screenshot

Topaz Adjust

“Quickly and easily make your photos stunning by using Topaz Adjust’s creative exposure, powerful detail enhancement, and unique color manipulation tools.”

Price: $49.99

screenshot

Focus Enhancement

Bokeh 2

“Bokeh 2 provides a wide range of creative focus effects and accurate lens simulation in a simple interface. Photographers use Bokeh to draw attention to their subject by manipulating focus, vignette, and depth of field. Bokeh gives you the visual language of specialized lenses without the expense or hassle. Just drop a focus region over your subject and choose a preset or easily craft your own look.”

Price: $199.99

screenshot

FocalBlade

“FocalBlade effectively sharpens photos for display and print, reduces noise and produces great looking blur, soft focus and special effects. FocalBlade is ideal for sharpening and enhancing all kinds of photo, e.g. snapshots, landscapes photos, portraits as well as high-ISO shots, because it effectively sharpens and reduces noise at the same time.”

Price: $69.95

screenshot

DOF Pro

“Naturally occurring depth of field has extremely complex optical characteristics. It cannot be simply simulated through the use of a standard blur filter. Lens size, subject distance, aperture shape, lens curvature, film grain, spherical aberration, chromatic aberration, lens asymmetry, transparency, light refraction, motion blur and much more must be taken into account in order to achieve an accurate and convincing depth of field effect. DOF PRO carefully takes into consideration all of these aspects in order to produce the highest quality depth of field output possible.”

Price: $99.99

screenshot

Enlargement

Blow Up 2

“Blow Up 2 is a Photoshop plug-in that produces enlargements dramatically sharper than any other software, especially Photoshop! Blow Up uses an innovative algorithm that temporarily converts pixels to a vector representation which results in perfectly smooth, crisp edges. Simulated texture and film grain keep photos looking natural even in extreme enlargements. Blow Up can even clean up JPEG compression artifacts when a client insists on using a low quality source image from the Web.”

Price: $249.00

screenshot

Perfect Resize

“Perfect Resize (formerly known as Genuine Fractals) is the industry standard for enlarging and resizing images. It is renowned across the photographic and printing industries for its ability to increase image size without the loss of sharpness or detail that you might normally expect. The patented, fractal-based interpolation algorithms work like nothing else and the results speak for themselves.”

Price: $199.95

screenshot

3D Transformations

3D Invigorator

“3D Invigorator for Adobe Photoshop allows you to easily create complex 3D objects, logos and text. Import a vector object or create a simple object inside the Photoshop plugin. Add lighting to make the object look more real. Then drag-and-drop 3D materials to make the object look transparent, reflective, or just plain cool. This 3D Photoshop plugin opens up a new world of creating 3D objects and text.”

Price: $199.00

screenshot

AV Bros. Page Curl Pro

AV Bros. Page Curl Pro 2.2 is an extremely powerful and high quality Photoshop plugin, which will definitely boost your productivity and creativity. This Photoshop filter lets you not only bend the image, using two types of bending (curling and folding), but also texturize it (using the bump maps), orient it in 3D space (including the perspective distortions) and obtain total control over the process of lighting the image (including the option of dropping inner shadows). All this is possible thanks to the all new and unrivalled engine of this plug-in.

Price: $49.95

screenshot

3DECovers

“Create dazzling ecovers that virtually jump from the screen into the prospect’s lap…giving them a level of ultra-realism and incredible detail they can almost touch with their fingers. There’s no huge learning curve, no monster manual to memorize, and no long list of prerequisite software. All you need is Adobe Photoshop–that’s it!”

Price: $97.00

screenshot

Noise Reduction

Noiseware

“Noiseware is a high-performance noise suppression software tool designed to decrease or eliminate noise from digital photo or scanned images. Unlike most image processing software techniques that utilize simple methods (such as median filters) to treat digital noise in images, Noiseware features a sophisticated yet fast noise filtering algorithm. Using the adaptive noise profile capability and sharpening function, Noiseware greatly reduces the visible noise while keeping the details in the images. ”

Price: $49.95

screenshot

Neat Image

“Neat Image is an image filter to reduce noise and grain in photographic images produced by digital cameras and scanners. Neat Image is indispensable in low-light (indoors, night, no-flash, astro) and high-speed (sport, action, children) photography.”

Price: $79.90

screenshot

Texture Creation

Texture Anarchy

“Texture Anarchy is a set of Adobe Photoshop filters for creating textures and borders. With these three Photoshop texture filters, you can create a variety of seamless, infinite textures that range from realistic and organic to design-appropriate. Plain old math is used to generate, extend, and output an image.”

Price: $129

screenshot

Machine Wash Deluxe

“Finally you can create professional quality image texture, aging and weathering effects with our Machine Wash Image Filters! This closely guarded secret of the design industry can now be yours!”

Price: $99.00

screenshot

Filter Forge

“Filter Forge is a high-end Photoshop plugin that lets novice and expert users create a wide variety of realistic and abstract textures and effects. It’s a must-have for any digital artist – 3D modeller, photographer, web designer and scrapbooker alike.”

Price: $166.00

screenshot

Kubota Texture Tools Industrial Pak

“You’ve never seen anything like the 50 textures you’ll find in our new ‘Industrial’ pak. Far from subtle, these striking looks give you the ability to add an element of techno-industrial style that will make your images snap! Edgy looks from textures like ‘Cobalt’, ‘Fingernails’ and ‘Lead’ bring a sharp, eye-catching look while ‘Radon’, ‘Polonium’ and ‘Zinc’ will give you that final touch, grunge-look that seniors are begging for in their portrait shoots.”

Price: $149.00

screenshot

Masking

Mask Pro

“For removing unwanted backgrounds, Mask Pro is the Photoshop plugin recommended by Advanced Photoshop magazine. Mask Pro allows you to cut out a subject from the background by assigning keep and drop colors and simply painting away the background. Mask Pro makes it easy to create masks, selections and clipping paths on difficult subjects like hair, glass and fog all in real-time.”

Price: $159.95

screenshot

Fluid Mask 3

“Take masking to the next level with Fluid Mask 3. The professional choice for quality masking, Fluid Mask 3 is industry recognised for excellence. Quick to pick up and intuitive to use – gets professional results fast.”

Price: $149.00

screenshot

EZ Mask

“EZ Mask is an easy to use interactive image masking tool capable of extracting almost any object in an image–even if you are dealing with fine hair detail, smoke, or reflections. This extraction process creates what is known as a mask–essentially a black and white cutout. White mask areas are extracted, black areas not, and gray areas in between represent a level of transparency. Once a mask is extracted, the foreground object can be seamlessly composed onto a new background in Adobe Photoshop as well as apply filter and image corrections only within the area defined by the mask.” Also check out Power Mask from the same developer.

Price: $150.00

screenshot

Web Design

SiteGrinder

“If you know Photoshop then you already know enough to start creating web pages for yourself and your clients. With SiteGrinder there is no longer a requirement to slice up your web design and send it off to a developer to convert your design from Photoshop to HTML / XHTML and CSS. SiteGrinder does all of that tedious work for you. Your Photoshop web design is output just the way you envisioned it – resulting in a full functioning website.”

Price: $397.00

screenshot

Divine

“Divine suggests easy steps to convert Photoshop to WordPress theme that any of you can carry out. Yes, that’s right – you need no special extended knowledge about HTML, no special skills in coding, basics are completely enough to convert PSD to WordPress. You’ll find all necessary information about converting Photoshop to WordPress at our site. ”

Price: Free (Still in beta, Windows only)

screenshot

Miscellaneous

DiskFonts

Browse and install uninstalled fonts right from Photoshop.

Price: $29

screenshot

ColoRotate

“Fully Mac and Windows compatible with Adobe Photoshop CS4 or newer. The ColoRotate 3D color editor plugin for Adobe Photoshop CS4 is intended to give you another way to edit colors — intuitively and effectively. The magic of ColoRotate is that your colors are displayed and edited in three dimensions, the same way your brain naturally understands colors. ”

Price: $9

screenshot

What Are Your Favorite Plugins?

There are a few plugins from the list above that I simply love using. For example, Machine Wash is unrivaled for creating awesome grunge effects; I’ve never used anything else that even comes close. Also, Page Curl is a great tool that I used daily back when I in print design and constantly creating product mockups.

Leave a comment below and let us know what your favorite Photoshop plugins are and why you can’t live without them!

The Easiest way to order PSD to HTML, from The Site Slinger

The Site Slinger turns designs into code, and sets itself apart from other PSD to HTML companies with its quality, reliability, & speed. We are the only company to offer easy online ordering and a fully transparent development process.

We’ve implemented a new online ordering system!

Check out this walk-through and see how easy and fast it is to get your project from design to code with PSD to HTML from The Site Slinger.

LOG IN/REGISTER

Enter your email address and password, or select CREATE ACCOUNT at the top to register as a new customer.

The easiest PSD to HTML


UPLOAD PROJECT FILES

We make it a breeze! In the SUBMIT A NEW ORDER section upload your PSD file(s) via drag-and-drop, or click ‘Pick File’ to browse and select your file. We’ll see the files right away, and you can always add more later.

The easiest PSD to HTML


ENTER PROJECT INFO

While your file is uploading, let us know your Project Name, and select your Project Type & Project Deadline from the drop down options. Tell us a little bit about your project, or ask any questions you might have – we’ll see your order immediately and are ready to help.

The easiest PSD to HTML


VIEW ORDERS

To view an existing order, select YOUR ORDERS from the left menu. Your current orders, and completed orders, will be listed. Select the VIEW PROJECT button to see an order’s details. A consolidated list of your order history makes for easy reference – each and every time.

The easiest PSD to HTML


REVIEW ORDER DETAILS

We want you to feel happy, not sad, during development so we built a fully transparent ordering process. In the project details screen you can view the Project Status, Project Price, Confirmed Delivery date and even view an Invoice in the left sidebar. You can also leave your comments about the project and check for our replies. You will receive an email notification whenever we comment or have an update for you. That’s how we keep you updated at each step in the development process!

The easiest PSD to HTML


REVIEW/ADD ORDER FILES

On the ORDER FILES tab within the same screen you can review the file(s) you’ve already uploaded, and add more files, if you need to. As always, we’ll promptly review your order & files, and ensure everything’s in place for a quote. That’s just the first step in getting the project turned around as quickly as possible – we make sure all PSD to HTML projects are completed in 7 business days or less.

The easiest PSD to HTML


OTHER FEATURES

Click the BACK TO YOUR ACCOUNT button in the upper right to go back to the main account page. From here, you can also Edit Your Profile, or get your Referral Program details. Spread the word about The Site Slinger and receive a credit on future orders!

The easiest PSD to HTML


What we do.

PSD to HTML

Built for designers and headquartered in Austin, Texas, The Site Slinger makes building custom websites easy.  Send us your PSD files and we return HTML code in 7 business days or less. Take our HTML and use it to create custom websites, WordPress themes, web apps, enterprise software or whatever else you can think of. This is the fastest way to get building for all your web projects.

PSD to WordPress

Our PSD to WordPress product is the best starting point for custom WordPress development. We hand code your PSD files into static HTML views and then compile them into a basic WordPress theme for custom development. We deliver the WordPress theme files and SQL file for your developer to customize.

If your project requires additional development and your team is without a developer we can recommend great developers.

We want to give web design and development teams an upper hand with easy PSD to HTML and WordPress. Our easy online ordering, personal 24/7 service, and expert developers take the pain out of outsourced development.

Test us out! Submit a design for a free quote today and we’ll be happy to give you a $100 discount off your first order. If you have any questions, just let us know!

Design Rules for PSD to HTML

Want to make your development team love you? Learn how to design your PSD (Photoshop design files) into clearly labeled, appropriately layered files for PSD to HTML!

If you’re coding PSD to HTML/CSS, you know that there’s often a disconnect between the person creating the designs and the development team coding them. With well organized and labeled files you can avoid many of the worst web development pitfalls.

By following these simple steps you can hand your PSD designs off to a good PSD to HTML team and they will come in back pixel-perfect, just like you imagined. This makes PSD to HTML easy for both you and the development team.

Some basic rules to follow:

1. One PSD file per page template or folders for each page in a single PSD file. What is a PSD?

2. Label all folders with the section of content on the page they refer to (Top navigation, Content, Footer, etc) Example

3. Separate folders for “on” and “off” states.  Make sure to separate your on/off states into different folders so the development team can easily identify the different states in the design.

4. Provide a text file or .pdf that clearly outlines all functionality for the individual pages (this includes things like animations, slide transitions, etc.)

5. Be sure to design all animation states, javascript validation, button states (click, hover, off), modals and anything else you can think of. If you don’t see it in the design, we can’t see it to code it!

 PSD to HTML Example

This is an example of a PSD single page with well organized folders for the content of the page. The organization of this is is clear and easy to follow.There are subfolders for each portion, clearly labeled.

PSD File Structure

Within the folder structure each page has its own subfolders that are all appropriately named. The elements for each group are within the subfolder and vector images are imported to the file when necessary (logos or other images). Make sure to show different on / off states. Rather than show multiple flat files for each state, they should be organized and named within the PSD in a way that the development team can understand.

Below is a good example of how files should be organized when you hand them off to your development team. You will see that there is 1 PSD per page with all of the necessary states for web development included in each PSD file.

Photoshop (PSD) File Structure

FileStructure


If you hand us well organize and labeled PSD files, our team will code the HTML/CSS and hand you back pixel perfect, markup!

Final Markup (HTML, CSS, JavaScript)

File_Markup


If you have questions about the process we would love to hear your thoughts in the comments!

Web Design and Development with Mobile SEO in Mind

We’ve broken down the key features of responsive web design and discussed the benefits that make it the go-to choice of web designers today. But how do search engines feel about all of this?

SEO is at the forefront of every web publisher’s mind.

So whether you’re an internet business pining for maximum clicks, or a new blogger luring readers to your corner of the web, it’s a topic that deserves priority consideration when deciding how you’ll approach ‘going mobile.’

Let’s look briefly at the top search engines.  These are Google, Bing, Yahoo!, and Ask.com (source). These four are far more popular than other search engines out there so it makes sense to focus your SEO efforts on these major players as they’ll be driving most of your indirect traffic.

The search engines primarily use a three-pronged approach comprised of: a web crawler to follow links and ping millions of sites efficiently; an indexer that, well, indexes their findings in a database; and a query processor to interpret your search terms and provide the best matches from the database.

Mobile SEO

Beyond traditional mobile web development.

While the SEO world still focuses its efforts on desktop design, the world of mobile design and development has boomed – inevitable considering our smartphone-driven lives. Traditional web development often calls for duplication of web content for desktop and mobile sites. This dual-mode presence calls for time-consuming URL redirects, separation of content, and splitting site traffic, which isn’t good for user experience or that all-important mobile SEO.

Again, we find ourselves landing on responsive web design as the solution (SEO mobile web development is the key!). Keeping your site and content singular is inherent in this web development technique  – no URL redirects, no multiple web crawls needed from the search engines, no split traffic hurting your rankings. All this is possible just by choosing a better web design strategy!

There are numerous ways to make your site responsive, including using a responsive framework like Twitter Bootstrap or coding a responsive page template with @mediaqueries.  Learn more about responsive design.

For an expanded look at mobile SEO and mobile design/development, reference: http://www.webdesignerdepot.com/2012/11/seo-for-the-mobile-web/

*Photo courtesy of Fotopedia, used under Creative Commons License.

HTML5: The Language of the New Web

No longer a novelty, HTML5 has already changed the way web developers code and the way users interact with websites. Contributing to the decline of Flash, HTML5 is an undeniable force utilized by countless modern websites.

HTML5 Logo

The New Standard.

HTML5 is setting the bar for the ever changing web landscape. In addition to being integral to the single-site, multi-device experience, HTML5 serves as a standard for video, Flash-like interactivity, and is even creeping into the ad space. With HTML working hand in hand with CSS3 and JavaScript, HTML5 brings us to the next level of web development.

HTML5 is paving the path of the future for the Web:

It will be the go-to language for cross-platform development. According to Web Developer Juice, “Almost every platform – mobile or web – is now making the shift to HTML5 (this includes Blackberry OS, Palm WebOS, and Windows 8).” And Strategy Analytics predicted that HTML5 phones are a hyper-growth market, and global sales will increase 365% by 2016, from 2011. Developing for the desktop now includes developing for mobile. Which means faster and more cost-effective reach.

Ads will continue to shift from Flash. Apple adamantly denounced Flash, so, unsurprisingly, their iOS devices lack compatibility with those traditional Flash ads you otherwise see blinking at you across the web. With so much of mobile web traffic coming from iPhone and iPad users, advertisers can’t ignore that fact. Even on desktops, HTML5 aims for faster loading and better integration. Google Mobile Ads now offers a feature to easily convert Flash ads to HTML5 in Adwords and offers HTML5 banners. Pointroll goes as far as calling HTML5 “the future ‘Secret Sauce’ in online advertising.” HTML5 proves, once again, it is the solution for more effective and efficient reach.

It’s a robust and clean coding standard aimed at streamlining coding, publishing and browsing. HTML5 has been designed to do away with the need for add-on browser plugins. Many features are intended to improve site discovery and overall SEO, translating into more traffic. HTML5 includes the use of Canvas, which provides the potential for more graphic interactivity and an alternative to loading images the ‘old’ way – even on the fly! With better support for feedback forms, drag-and-drop tools, chat, and other popular interactive elements HTML5 aims to make developing and using the new Web much easier.
You can reference a useful infographic about HTML5 features and the benefits for future web development here.

To make the most of the new Web, the HTML5 experts at The Site Slinger code with the future in mind, utilizing the latest tools to provide robust user experiences, beautiful and clean websites. We’re happy to turn your vision into a pixel-perfect site via our best-in-the-world PSD to HTML coding, so contact us or submit your design and let’s get it done!

*Image courtesy of W3C, used under Creative Commons licensing.

30 Brand New PixelsDaily PSD & CSS Design Freebies

Loads of new freebies and open source codes are placed online every day. Web & mobile designers can learn a lot by studying newer interface trends and design layouts.


featured-pixelsdaily-screenshot-image-freebies

Loads of new freebies and open source codes are placed online every day. Web & mobile designers can learn a lot by studying newer interface trends and design layouts. PixelsDaily is one such website which publishes freebies and premium content. This is an excellent resource for designers who want to dig a bit deeper into constructing usable layouts for the web.

In this roundup I have put together 30 of the latest freebies from PixelsDaily. You will find both PSDs and HTML/CSS codes mixed in with each other. Some freebies actually offer both graphics and the code together! But no matter what items you’re looking for, this showcase is bound to have something cool.


Google Maps Markers (PSD)

These varied Google Map Makers are a fantastic set of resources to have in your design collection. They represent different things — a restaurant, telephone, gas, airport, rail station, and mechanic. It’s simple to implement these into an embedded Google Map!

photoshop freebie psd download googlemaps

Custom Slideshow (PSD + CSS)

This custom slideshow is provided both as a PSD, or fully coded in CSS and HTML. It’s wrapped up in a delightfully simple design, with subtle shadows, borders, and textures. It’s simple to make a few tweaks to add your own images, captions, and information. Enjoy!

freebie jquery slideshow html css webdesign download

Info Widget (PSD)

This is a tidy little information widget for a blog post, containing the title, author information, comments, and likes. Presented as a well organised PSD file to integrate into your own designs!

psd freebie information widget website

Sticky Note Paper (PSD)

A “Sticky Notepaper” — a piece of paper with lined paper, a download button, and some sticky tape that wraps it all together! Really simple, but a useful starting point for your own note-style interface.

sticky notepad paper designs psd freebie

Windows 8 Metro Buttons (CSS)

A selection of Metro style, Windows 8 buttons and icons. All coded using HTML and CSS, so they’re incredibly easy to drop into your own design, customise colours, and so on. Add a little simplistic metro style to your next interface!

css3 html windows win8 buttons

Notification Centre UI (PSD + CSS)

A versatile PSD of a notification style interface. It includes a drop-down list of recent notifications/messages, a login/connect window, and pop-out messages with more information as well. Packed with potential functionality for your next app, and we’ve also added a fully coded CSS/HTML version. Enjoy!

notification center user interface webdesign psd freebie

Timer Interface (PSD)

A stylish countdown/stopwatch/timer interface, with play/stop/restart buttons, countdown digits, the current time, and some simple OS X chrome.

stopwatch timer psd freebie ui interface

Yellow Subscribe Box (PSD)

A stylish subscription box, giving your readers the information they need to subscribe to your site. It contains two options — one for an email newsletter subscription, and another for RSS. The base colour is yellow, but it’s easy to tweak to fit in with your own design.

yellow email subscription box freebie download

Spotify Mini Player (PSD)

A stylish mini-player interface for Spotify. It contains a track listing, simple play/volume controls, and a full-screen graphic. The perfect way to get started with a media player, whether for Spotify, or any other third party service!

green user interface mini music player freebie

Confirmation Dialog (PSD)

A beautiful confirmation dialog box with a subtle set of gradients and textures, a header, close button, two different button styles, and some explanatory text. A really gorgeous interface on which to build upon!

freebie windows modal box popup psd freebie website

Newsletter Signup Form (PSD)

A detailed newsletter sign-up form PSD, including a description of the mailing list, fields for name and email address, an anti-spam message, and a prominent “Join” button. Enjoy!

signup popover window modal design freebie download

Metro Twitter Feed

Microsoft have been doing a wonderful job with their simplistic “Metro” style, and today we’re presenting a lovely Metro-style twitter feed. Containing various states for different tweets, links, and timing. A really wonderful little widget!

windows metro twitter ui interface design

Pro Admin Interface (PSD + CSS)

There’s something about this one that we really love! It’s the top part of a simple administration interface design, with various navigation options / notifications, and a content box. As well as providing you with the original PSD, we’ve also gone to the trouble of coding it all up in CSS and HTML for you. Enjoy!

freebie html css admin toolbar ui layout template

Blur Login Form (PSD)

Login forms can be tricky. They need to be simple, convey the basic information, and exude a little style. This one presses all the right buttons, with some beautiful interface styling and typography. Enjoy!

blog login psd freebie form download

PixelsDaily iPhone App Interface (PSD + CSS)

We thought it’d be fun to create a funky app interface for PixelsDaily, then give it away free for you to use! Provided both as a fully coded HTML/CSS version, and a PSD. It has some uniquely created iOS interface elements, an author area, and a set of resource thumbnails.

custom iphone ios ui interface design freebie download

Trendy Nav Bar

A stylish navigation bar, provided as a PSD. It comes in four different colours, and might just be the perfect addition to the top of your next web design project!

trendy navigation bar interface psd freebie

Settings Panel (PSD + CSS)

We’re really pleased with this one. It’s a settings panel with brushed metal interface elements / toggle switches. Not only is this provided in the usual PSD format, but we’ve gone ahead and coded it up as a fully functional HTML/CSS version for you!

freebie download psd website ui interface html

Tiny Note (PSD)

Just a quick note about this one. It’s a note. A beautiful, pixel-perfect note. On a subtle background, it’s a paper “stack” with close/minimize icons, a link to read more, and some lovely typography. Hope you find it useful!

tiny note freebie psd download pixelsdaily

vCard Minisite (PSD + CSS)

This is a beautiful minisite vCard in PSD format. It contains elements for your social media profiles, an avatar, a small bio, and a “folded corner” for someone to download a copy of your vCard. If you want to put up a vCard website, this is the perfect way to do so! We have also included a fully coded CSS and HTML version, complete with an animated corner roll-over. Enjoy!

vcard freebie website ui layout download css html psd

Design Agency Layout (PSD)

A fully-loaded PSD file, this graphic contains a sleek and professional layout for a design agency or portfolio. It has plenty of room for your logo, navigation, an introductory text area / video, and a set of different “services” that you might offer. It’s really simple to customise for your own needs!

freebie download psd pixels website agency layout

PHP Metro Generator Webapp (CSS/PHP)

Something a little different today, this is a PHP application that helps you generate unique metro-style interfaces with ease. Just drop it onto your server and experiment away! You’ll need to upload this to a web server to run the script and see how it works.

metro user interface layout webapp php testing

Stylish Ribbon (PSD)

Four(4) colourful ribbons with a 3D look and feel, stiched outer pattern, and a top shadow to create the effect of the ribbon dropping over its’ container. Have fun integrating it into your own design!

psd freebie download pixelsdaily website

Credit Card Form (PSD + CSS)

This is an incredibly handy credit card information form, containing fields for your card number, type, expiry date, and CVV number. It’s simple enough to incorporate into any design, and is provided both as a PSD and fully coded as a CSS/HTML design. Enjoy!

credit card ui interface form website freebie download

Various Alert Boxes (PSD + CSS)

Three different alert box styles are included in this PSD — A green “success” alert, a yellow “alert” … alert, and a red “error” alert! We’ve also built one of these into CSS and HTML for you, just to save you a little time!

alert boxes website interface css freebie download

Delicious Notepad & Ribbon (PSD)

A simple notepad freebie with a classic striped/leather look-and-feel, and a red ribbon flourish of detail. Provided as a well-organized PSD file for you to incorporate into your own designs!

notepad psd freebie download website graphics

Notepad Interface (PSD)

We’ve created a pixel-perfect notepad interface, straight out of a cutting-edge Mac app! A wonderful basis on which to build your own application interface.

freebie website notepad interface psd download

Animated Buttons (CSS)

This one is just beautiful. Two examples of a gorgeous animated button — both have subtle animations in the background, and plenty of excitement when you hover over them! The “Favorite” icon takes on the form of a beating heart, with the the download flying out, then back again. You’ll have to download the freebie to see them for yourself – don’t just take our word for it!

pure css animated buttons website freebie download

Ripped Tasks List (PSD)

A “ripped” skeumorphic to-do list with a paper effect, check-boxes for completed tasks, delete icons, and a button to add a new task. Take it, build upon it, and enjoy! Provided as a simple layered PSD file.

todo list website interface papers freebie psd download

Clock iOS App Icon (PSD)

A delightful wrist watch/clock icon, designed for an iOS app. It is provided in a range of different sizes suitable for each different iOS device, and we’d love for you to use the end result however you’d like!

freebie psd wristwatch app icon mobile retina display

Paper Stack (PSD)

A beautiful paper stack, complete with a quotation, avatar, stylish pin, and a subtle textured background. It’s a delightful piece of interface design work, and we hope you enjoy it!

pinned paper stack pin icons design

Conclusion

Many of these elements are great for building complex layouts and applications. Mobile designers will especially enjoy some of the aesthetic pieces such as buttons and notepads. But in my opinion this set of freebies offers a powerful start to the new year. Be sure and keep updated for new releases over the course of 2013.

So what IS responsive web design, anyway?

With the world going mobile there’s no way around it: your site has to adapt to any and every device that’s out there. Think about it… How many devices have you used today? I can count checking my email on three already!

Don’t get lost in buzzwords, understand why/how responsive web design works.

With the world going mobile there’s no way around it: your site has to adapt to any and every device that’s out there. Think about it… How many devices have you used today? I can count checking my email on three already!

In the past, the solution to differing device screens was to build an alternate version of your site, or even multiple apps optimized for the various mobile OS’s. However, these options often prove to be too costly in development and cumbersome to perform maintenance and updates. So what is today’s solution? Responsive web design!

Well, you ask… what IS responsive design? It’s one of those buzz words being thrown around a lot right now.

Responsive design allows for a single site to be designed and developed, yet performs effectively and beautifully across devices of varying screen sizes and orientations.

There are a few key features that allow this to work:

A flexible framework for content – the ‘grid’

The foundation of the responsive design, the grid provides easy content management across varying screen sizes through the repositioning of content areas or boxes.

Check out some great info on how to use the grid in design and download some basic templates here.

Responsive web design
Content moves based on screen size, but should still relay the same message in an aesthetically pleasing way. (Image courtesy of DezignMatterz)

Adaptable visual content

From images to backgrounds and graphical motifs, a solidly designed responsive site must be able to communicate your vision consistently, regardless of device and screen size. These elements of the page must be able to move around and make sense from a user perspective and still effectively tell the user what you’re saying/selling.

Check out some great examples of sites that do this here.

The ability to respond to devices

Generally done via ‘media queries,’ a responsive site must determine the best display configuration and adapt in an instant to changes in screen orientation and size. This should be done in such a way that the user doesn’t notice the site changing.

Check out some great examples of this here.

The Site Slinger understands the need to develop websites in a cost-effective, multi-platform manner. We love coding PSD to responsive design! You shouldn’t spend all of your resources managing updates or site variations across a seemingly infinite sea of different mobile devices. That’s why we build effective, high-value, responsive sites, giving you the ability to deliver content consistently and reliably to all visitors, whether they’re on a desktop, tablet, or smartphone.

If you’d like to discuss the options for translating your web design into a fully responsive site, please contact us, or submit a quote. We’re happy to turn your vision into a pixel-perfect site via our best-in-the-world PSD to HTML coding.

*For further reference on responsive elements see, “Understanding the Elements of Responsive Web Design

Photoshop to CSS Conversion: 3 Methods Compared

Converting Photoshop mockups to live web code is an extremely common practice among web designers. We’ve all done it a million times by hand, so it’s pretty exciting when we start seeing solutions pop up that will help us automate this process.


screenshot

Converting Photoshop mockups to live web code is an extremely common practice among web designers. We’ve all done it a million times by hand, so it’s pretty exciting when we start seeing solutions pop up that will help us automate this process.

The latest version of Creative Cloud Photoshop CS6 has a built-in feature for converting Photoshop styles to CSS, and if you need another solution, there are two solid extensions that you can check out. Today we’ll compare the results of all three methods: Photoshop, CSS3Ps and CSSHat to see which is best.


Our Three Candidates

This article is all about comparing the results from three different methods of achieving the same goal. We have a design in Photoshop and we want to see it built in HTML and CSS.

Our three methods include Photoshop itself (version 13.1) as well as two extensions CSS3Ps and CSSHat. I recently created a screencast for Psdtuts+ that introduces and does some comparison between Photoshop and CSS3Ps, which you can find here.

I didn’t cover layer group functionality in that tutorial though so I thought it was worth another go and decided to toss in CSSHat as well so we really cover the bases well.

Our Test Case

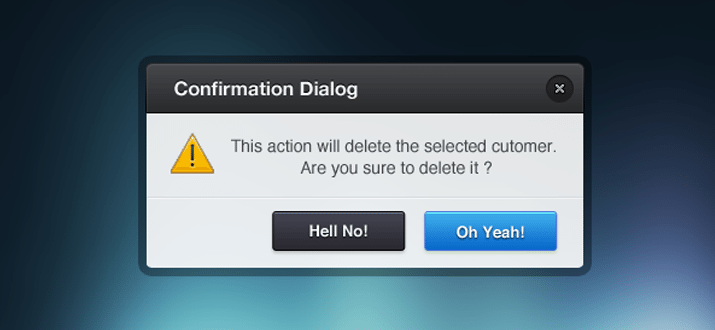
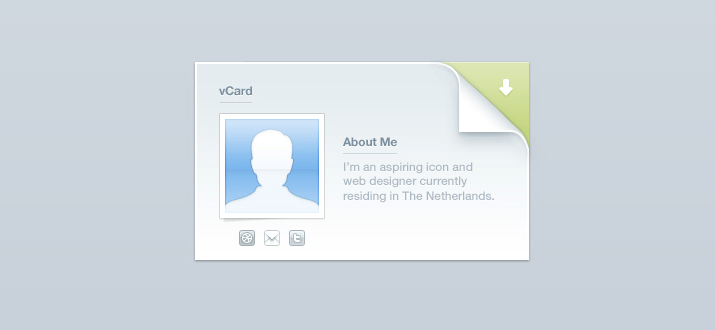
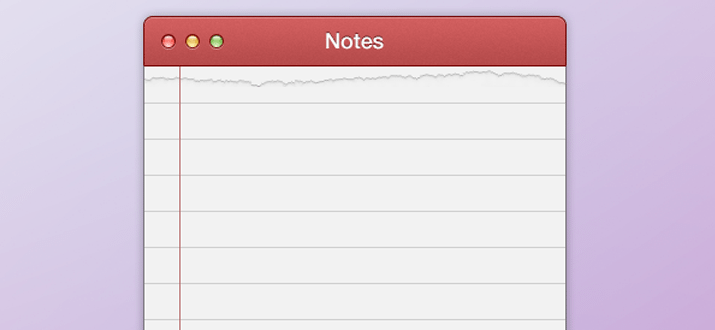
We’ll need something to test the different conversion methods on, so I whipped up a generic UI panel that could hold anything you want:

screenshot

This is basically comprised of three different layers: the text layer, the top bar and the background. Here I separated them out a bit so you could get an idea of how they were constructed.

screenshot

Below you can take a look at our layers palette. Note that this object is structured very intentionally. All three of the methods that we’ll look at today convert layer names to class names in CSS, so you want to be sure that you’re very careful about how you name your various pieces. Also note that the shapes are made from vector shape layers.

screenshot

Some of the methods that we’ll try out support layer groups, which means we’ll want to convert the structure here to a div structure in our HTML.

HTML

Photoshop can take care of the CSS for us, but we’re still on our own with HTML. Here’s a quick attempt at an HTML structure that will work with the code that Photoshop is going to generate. Without this in your HTML, the CSS won’t do a thing!

	
		<div class="panel"> <div class="paneltop"> <p class="type">Quick Panel</p> </div> <div class="panelback"></div> </div>

Photoshop

Let’s start off with the built in Photoshop functionality. The process here is extremely easy, all we have to do is select our layer group in the Layers panel and go to Layer>Copy CSS (you can also access this command with a right-click).

screenshot

Photoshop provides pretty much zero feedback that anything has happened at this point. There are no options to tweak, no panels to inspect, just the menu command that we clicked above, which places a big chunk of code into our clipboard. Here’s the output, straight from Photoshop.


.panel {
  position: absolute;
  left: 180px;
  top: 25px;
  width: 360px;
  height: 427px;
  z-index: 7;
}
.type {
  font-size: 19.913px;
  font-family: "Helvetica";
  color: rgb( 255, 255, 255 );
  line-height: 1.11;
  text-align: center;
  -moz-transform: matrix( 1.70449868947994, 0, 0, 1.72443193254442, 0, 0);
  -webkit-transform: matrix( 1.70449868947994, 0, 0, 1.72443193254442, 0, 0);
  position: absolute;
  left: 83px;
  top: 25.902px;
  width: 180px;
  height: 27px;
  z-index: 6;
}
.paneltop {
  background-image: -moz-linear-gradient( -90deg, rgb( 1, 98, 171 ) 0%, rgb( 0, 52, 91 ) 100%);
  background-image: -webkit-linear-gradient( -90deg, rgb( 1, 98, 171 ) 0%, rgb( 0, 52, 91 ) 100%);
  position: absolute;
  left: 2px;
  top: 1px;
  width: 351px;
  height: 81px;
  z-index: 4;
}
.panelback {
  border-radius: 20px;
  background-color: rgb( 224, 225, 226 );
  box-shadow: 1.5px 2.598px 5px 0px rgb( 0, 0, 0 );
  position: absolute;
  left: 2px;
  top: 1px;
  width: 351px;
  height: 418px;
  z-index: 3;
}

The Result

If we toss this into a code editor and take a look at the result, the results are a little disheartening. Photoshop didn’t do a great job with the conversion. For starters, the top bar doesn’t have rounded corners. Also, the shadow seems to be at full opacity (too dark) and the type placement is off. If gives us a strong start and genuinely saves us a lot of time, but it’s probably not the magic solution you were hoping for from Photoshop.

See it live: Click here

screenshot

To make things worse, if we jump back and look at the code, there’s plenty to complain about. There are some really wonky things going on here such as the unnecessary transform on the text. It seems that you can let Photoshop write CSS for you, but I’m not convinced that you should.

CSS3Ps

Our next candidate is CSS3Ps, a completely free Photoshop plugin that predated the built-in Photoshop functionality. The website shows some pretty complex examples so hopefully this will tackle our project a little better.

screenshot

With the CSS3Ps extension installed, go to Window>Extensions>CSS3Ps. Then select the layer group and click the logo that pops up inside of the CSS3Ps panel.

screenshot

Once you press that button, a web page opens up and presents you with a timer. You’re forced to wait twenty seconds and look at an ad, which sucks but given that the extension is free, it’s understandable.

screenshot

From here you’re taken to a page containing the code, which I copied and pasted below. Note that this time around, I had to add in periods before the class names. CSS3Ps takes the layer name exactly as it appears in Photoshop, so you add in the “.” or “#” symbols there.

	.type {
  font-family: Helvetica;
  font-size: 10px;
  color: #fff;
}

.paneltop {
  width: 351px;
  height: 81px;
  -webkit-border-radius: 20px 20px 0 0;
  -moz-border-radius: 20px 20px 0 0;
  border-radius: 20px 20px 0 0;
  background-color: #000;
  background-image: -webkit-linear-gradient(top, #0162ab, #00345b);
  background-image: -moz-linear-gradient(top, #0162ab, #00345b);
  background-image: -o-linear-gradient(top, #0162ab, #00345b);
  background-image: -ms-linear-gradient(top, #0162ab, #00345b);
  background-image: linear-gradient(to bottom, #0162ab, #00345b);
}

.panelback {
  width: 351px;
  height: 418px;
  -webkit-border-radius: 20px;
  -moz-border-radius: 20px;
  border-radius: 20px;
  background-color: #e0e1e2;
  -webkit-box-shadow: 2px 3px 5px rgba(0,0,0,.34);
  -moz-box-shadow: 2px 3px 5px rgba(0,0,0,.34);
  box-shadow: 2px 3px 5px rgba(0,0,0,.34);
}

The Result

There’s a lot to like about the CSS3Ps output. For starters, it treats each individual layer as its own object and doesn’t attempt to position them over each other. I actually prefer this and always immediately strip out the absolute positioning code that the built-in method uses. This keeps the focus of the conversion where it should be: on style.

See it live: Click here

screenshot

Speaking of style, the results in that area are improved as well. Notice how the top bar actually has a border-radius this time around and how the box-shadow uses an alpha value to reduce the opacity. This version might be a little prefix heavy on things that no longer require prefixes, but otherwise the code isn’t half bad.

Also, the fact that you can get the output reformatted in Sass or SCSS is a killer feature that easily makes this method better than the default Photoshop feature.

screenshot

CSSHat

The third and final method that we’re going to check out is CSSHat. Like CSS3Ps, it’s a Photoshop extension, but this one will run you about $30.

screenshot

To use CSSHat, simply select the layer that you want to convert and open the CSSHat panel (find it in the extensions menu as with CSS3Ps above). Unfortunately, CSSHat currently doesn’t support layer groups, so you’ll have to do it on each individual layer. This is a serious strike against CSSHat, but it makes up for it in versatility.

screenshot

I love that I finally have some options to tweak. The other two methods were easy, but if you don’t like something, tough! Here I can toggle four different options: comment explanations, browser prefixes, layer dimensions and whether or not the code gets wrapped in a rule named after the layer.

Also notice that you can get the output in an impressive variety of formats: CSS, SCSS, Sass, LESS, Stylus and Stylus CSS. Here’s the output for the plain CSS version:

	.type {
  color: #fff; /* text color */
  font-family: "Helvetica";
  font-size: 10px;
}

.paneltop {
  width: 351px;
  height: 81px;
  -moz-border-radius: 20px 20px 0 0;
  -webkit-border-radius: 20px 20px 0 0;
  border-radius: 20px 20px 0 0; /* border radius */
  -moz-background-clip: padding;
  -webkit-background-clip: padding-box;
  background-clip: padding-box; /* prevents bg color from leaking outside the border */
  background-color: #000; /* layer fill content */
  background-image: url(data:image/svg+xml;base64,PD94bWwgdmVyc2lvbj0iMS4wIiA/Pgo8c3ZnIHhtbG5zPSJodHRwOi8vd3d3LnczLm9yZy8yMDAwL3N2ZyIgd2lkdGg9IjEwMCUiIGhlaWdodD0iMTAwJSIgdmlld0JveD0iMCAwIDM1MSA4MSIgcHJlc2VydmVBc3BlY3RSYXRpbz0ibm9uZSI+PGxpbmVhckdyYWRpZW50IGlkPSJoYXQwIiBncmFkaWVudFVuaXRzPSJvYmplY3RCb3VuZGluZ0JveCIgeDE9IjUwJSIgeTE9Ii0xLjQyMTA4NTQ3MTUyMDJlLTE0JSIgeDI9IjUwJSIgeTI9IjEwMCUiPgo8c3RvcCBvZmZzZXQ9IjAlIiBzdG9wLWNvbG9yPSIjMDA2MWFiIiBzdG9wLW9wYWNpdHk9IjEiLz4KPHN0b3Agb2Zmc2V0PSIxMDAlIiBzdG9wLWNvbG9yPSIjMDAzMzViIiBzdG9wLW9wYWNpdHk9IjEiLz4KICAgPC9saW5lYXJHcmFkaWVudD4KCjxyZWN0IHg9IjAiIHk9IjAiIHdpZHRoPSIzNTEiIGhlaWdodD0iODEiIGZpbGw9InVybCgjaGF0MCkiIC8+Cjwvc3ZnPg==); /* gradient overlay */
  background-image: -moz-linear-gradient(top, #0061ab 0%, #00335b 100%); /* gradient overlay */
  background-image: -o-linear-gradient(top, #0061ab 0%, #00335b 100%); /* gradient overlay */
  background-image: -webkit-linear-gradient(top, #0061ab 0%, #00335b 100%); /* gradient overlay */
  background-image: linear-gradient(top, #0061ab 0%, #00335b 100%); /* gradient overlay */
}

.panelback {
  width: 351px;
  height: 418px;
  -moz-border-radius: 20px;
  -webkit-border-radius: 20px;
  border-radius: 20px; /* border radius */
  -moz-background-clip: padding;
  -webkit-background-clip: padding-box;
  background-clip: padding-box; /* prevents bg color from leaking outside the border */
  background-color: #dfe0e2; /* layer fill content */
  -moz-box-shadow: 2px 3px 5px rgba(0,0,0,.34); /* drop shadow */
  -webkit-box-shadow: 2px 3px 5px rgba(0,0,0,.34); /* drop shadow */
  box-shadow: 2px 3px 5px rgba(0,0,0,.34); /* drop shadow */
}

The Result

As you can see above, the chunk of code this time is pretty huge, mostly due to the fact that the gradient is converted to a data URL. Below is the result if we paste directly into our code editor.

See it live: Click here

screenshot

As you can see, just as with CSSPs, the elements are merely styled, not positioned, we would have to push them into place ourselves. On that front, the styles look perfect with the exception of the text, which is tiny. I expect this has to do with the fact that I built the Photoshop version on a Retina screen though so you may not experience this bug (CSS3Ps actually did the same thing).

Who Wins?

“I recommend both CSSHat and CSS3Ps over what you get inside of Photoshop 13.1.”

None of the methods for converting Photoshop styles to CSS outlined above are perfect. The Photoshop version works, but the code is pretty ugly and the results don’t utilize the advanced CSS3 techniques that you’ll need to match things like opacity and complex border-radius setups. CSS3Ps is free and performs better than Photoshop, but the method of turning you to a web page that is hidden behind a twenty second ad delay is pretty annoying.

CSSHat is the best in the bunch as far as customization, but it doesn’t support layer groups. The default Photoshop method is the only one that positions your multiple items in a way that matches your canvas, which could be a good or bad thing (I wish it were an optional feature). Ultimately, nothing is going to give you the accuracy, power and versatility of coding by hand, but these tools can get you off to a strong start and save you some serious time.

Personally, I tend to favor CSSHat in this bunch. It’s a little pricy, but the functionality is stellar. It’s frankly a lot closer to what I wanted to see from Adobe. I think they really dropped the ball on this feature and I recommend both CSSHat and CSS3Ps over what you get inside of Photoshop 13.1.

What Do You Think?

Now that you’ve seen my assessment of these three tools, it’s time for you to chime in. Which of the above methods have you tried? Which do you think is the best? Let us know in the comments below!

50 Amazing Resources for Dribbble Lovers

Here at The Site Slinger, we’re huge Dribbble fans. Sort of a Twitter for design, this awesome site is home to beautiful bite-sized work samples from the web’s best designers.

screenshot

Here at The Site Slinger, we’re huge Dribbble fans. Sort of a Twitter for design, this awesome site is home to beautiful bite-sized work samples from the web’s best designers.

To showcase our love for Dribbble, we’ve put together a collection of fifty fantastic resources for anyone and everyone who uses Dribbble. From open source developer projects and quirky web projects to desktop and mobile applications, we’ve got enough Dribbble goodness to keep you occupied for months.


Developer

Dribbble API

The official Dribbble API documentation. If you’re a developer and you want to build anything related to Dribbble, start here!

screenshot

Jribbble

Jribble is a jQuery plugin that opens up various aspects of the Dribbble API. Grab shots, users, comments, rebounds and more.

screenshot

Rebbbounds

If you want to keep an eye on what developers are doing with the Dribbble API, hit up Rebbbounds, a Tumblr blog that’s chock full of great examples.

screenshot

GitHub Goodies

There are a ton of Dribbble related projects on GitHub, here’s a quick list of some that you should check out.

  • dribbble-php – PHP wrapper for the Dribbble API.
  • swish – Ruby wrapper for the Dribbble API.
  • Dribbble.js – Dribbble.js is a one file, library agnostic javascript file that will add your most recent dribbble shots to your website.
  • dribbble_desktop – A ruby script that scrapes rss feed of “shots” from dribbble.com, puts the images in a folder, generates an html file that you can load using WebDesktop. Poof – dribbble shots tiled nicely on your desktop.
  • Objective-Dribbble – A wrapper for the Dribbble API, written in Objective-C.
  • dribbble-codeigniter – Dribbble API Library for CodeIgniter.
  • Dribbble-node – Client API for Dribbble web site in node.
  • dribbbleCFC – ColdFusion wrapper for the Dribbble interface showcase API.
  • dribbble-dotnet – A Mono and .NET library for the Dribbble API, built using C#.
  • Dribbble-Sync – Drupal 7 module that syncs shots from Dribbble.
  • Dribbble-Retinizer – Chrome and Safari extensions that add a few nifty retina features to Dribbble.
  • dribbble-sass – Sass demo for Dribbble Show & Tell.
  • dribbble-dimmer – Chrome extension that enables the viewing of shots over a dimmed background.
  • Dribbble_Wrapper – Dribbble Wrapper takes the mobile Dribble website and put it inside phone gap to create a native android application.
  • dribbble-screen-saver – Pulls down popular shots for easy use in a Mac OS X “picture show” screensaver.

WordPress Plugins

WP Dribbble Shots

Adds a template function that grabs the most recent shots from the Dribbble user of your choosing.

screenshot

RainyShots

Similar to the one above, this plugin returns an array of 15 recent shots from any player.

screenshot

Web Apps

Liiikes: Top Players

Liiikes is like a Dribbble scoreboard. It shows you the statistics for all of the major players and scouts (recruiters).

screenshot

Jump Ball

A simple and fun memory matching game built with the Dribbble API.

screenshot

Nibbble

Nibbble is a web app, but it’s specifically built to allow a better Dribbble viewing experience for the iPad.

screenshot

Who Drafted Who?

Type in a Dribbble username, see who drafted that person.

screenshot

Box Seat

Box Seat is a no distractions, one-at-a-time shot viewer with keyboard controls.

screenshot

Full Court Shots

An infinitely scrolling grid of recent Dribbble shots. Great if you need a quick shot of design inspiration.

screenshot

Alley Oop

Search Dribbble by color. Really helpful if you have one color that you like and want to find some others to complement it.

screenshot

bbbrowser

Another simple grid full of Dribbble shots. This one doesn’t require scrolling though, just load up the page and watch.

screenshot

Mac Clients

Play by Play

Play by Play is the Dribbble client that I personally use the most. It has the feel of a desktop Twitter client, only it’s full of Dribbble shots. What could be better?

screenshot

Dribbbler

Dribbbler isn’t meant for viewing shots but for making them. Drag it over the area you want to shoot, click the button and upload.

screenshot

Nibbble — A Dribbble screensaver for OS X

Love Dribbble? Why not make it your screensaver? Mac users can do just that with this free software.

screenshot

iPhone Clients

iOS developers have definitely embraced Dribbble and its API. There are quite a few really sharp iPhone clients. Here are the ones that I found.

As far as I can tell, they pretty much all share most of the basic Dribbble browsing and interaction features. It really comes down to which interface you like the best. I personally think that PlayBook is pretty slick. It’s also free so it’s a good place to start.

Asssist for Dribbble

screenshot

Shotz – A Dribbble Client

screenshot

Swish

screenshot

Balllin ~ a Dribbble client

screenshot

PlayBoook

screenshot

Backboard

screenshot

Travveling for Dribbble

screenshot

Air Ball App

screenshot

Dunk

screenshot

Drishots

screenshot

Alley Ooop – A stream of inspiration shots from dribbble

screenshot

scoreboard! (coming soon)

screenshot

iPad Clients

Dribbble on the iPad is an entirely enjoyable experience. The large screen and touch interaction makes for an unrivaled browsing experience. It’s definitely one of my favorite ways to keep up on recent activity.

If you’re looking for a suggestion, the first two are my favorites. Dribbblr is from Tapmates so you know it’s awesome and Pick’n’Roll is just gorgeous.

Dribbblr for iPad

screenshot

Pick’n’Roll for iPad

screenshot

Courtside for iPad

screenshot

Dribbbits for iPad for iPad

screenshot

Dribbble Flow for iPad

screenshot

Android

Not an iOS user? Fear not, there are a couple of good Android Dribbble apps as well. Check them out below.

Pixle for Dribbble – Android

screenshot

Asssist | The Dribbble client for Android powered devices

screenshot

What Did We Miss?

This collection includes the absolute best Dribbble resources that I was able to find, but I’m sure that I missed a ton of great stuff. Leave me a comment with a link to your favorite Dribbble app, service or code project. Also be sure to let me know what you think of the resources above.